Having the best branding on your website is key to gaining trust from your customers. Sometimes that can be as easy as picking a really nice font for all your headings. This is a simple and in most cases free way to make a big impact to your design. Shopify themes have the ability to install custom fonts. You can license fonts for free in many cases and spice up your design instantly. Learn how to upload, and apply a custom font to your Shopify store below.
Step 1: Log in to the Shopify store admin and go to Online Store > Themes > and next to your theme, select "Actions" > Edit Code.

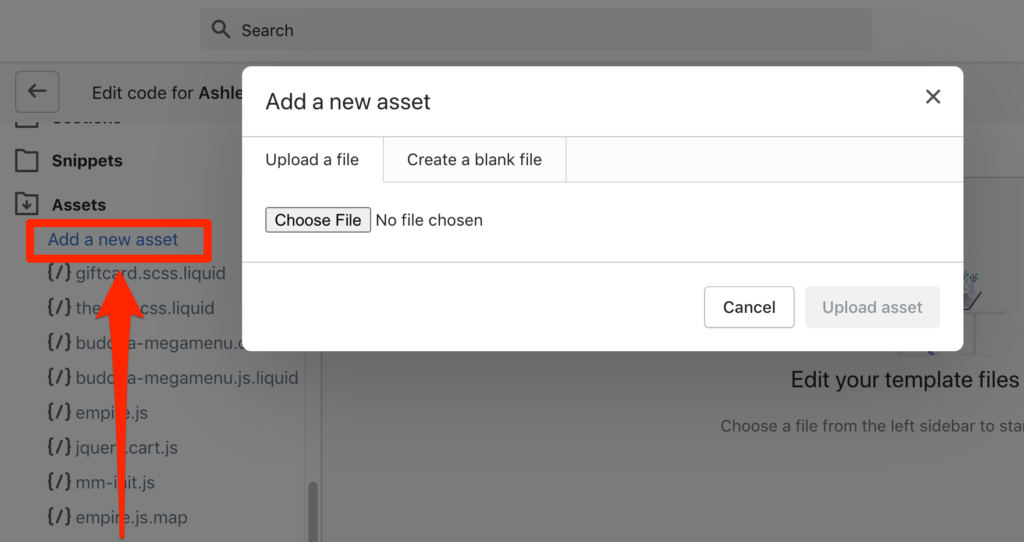
Step 2: The best way to install your font is to use a WOFF format. However, you can use many web formats. On the left navigation go into the "Assets" and click "Add a new asset". Select your font file and click the "Upload asset" button.

Step 3: The next step is to find the global CSS file. Each theme is different but its not hard to identify which file has the "css" in the name. Go to the Assets area and look for something similar to "theme.scss.liquid".

Step 4: At the very bottom of the css file you will paste in the following code. Replace the name of the font file that you uploaded to the assets area in Step 2 above where you see "Font-File-Name".
 @font-face {
        font-family: 'Font-File-Name';
        src: url('Font-File-Name.woff') format('woff'),
        font-weight: normal;
        font-style: normal; }

h1, h1 a, h2, h2 a, h3, h3 a, h4, h4 a, h5, h5 a, h6, h6 a, #nav li a, div.title a, .headline, .subtitle { font-family: 'FontName' !important; }
Step 5: Click Save. This will auto add your new font to the headings in the code. If you want to modify the headings this font applies to then remove any headings you don't want it to apply to.
Note: The font option will not show in your themes typography settings. The font must be controlled from the themes code if you want to modify it moving forward.
If you have any questions or need help with this then reach out to us today!

